Rate limit DRF endpoint with redis working example
I will try to be as practical as possible in this article. for more theoretical information, you can use this DRF throttling guide
let’s consider that you have a Django Rest project up and running, and you want to rate limit an endpoint. for that, we will use DRF throttling classes, and we will need Redis to store the rate limit data.
Install Redis as cache backend for Django and DRF. I will use Rocky Linux 9 for this example.
1 Install Redis service
sudo yum install redis2 Enable, Start and check the status of Redis
sudo systemctl enable redis

sudo systemctl start redis

sudo systemctl status redis
It should look like this:

next, we need to install the python client for Redis
3 Install Redis python client
pip install redis4 Install Django Redis Cache Backend
pip install django-redis5 enable django-redis cache
    CACHES = {
        'default': {
        'BACKEND': 'django_redis.cache.RedisCache',
        'LOCATION': 'redis://127.0.0.1:6379/',
        'OPTIONS': {
            'CLIENT_CLASS': 'django_redis.client.DefaultClient',
            }
        }
    }
6 enable DRF throttling
    REST_FRAMEWORK = {
        'DEFAULT_THROTTLE_CLASSES': [
        'rest_framework.throttling.ScopedRateThrottle',
        ],
        'DEFAULT_THROTTLE_RATES': {
        'hi': '60/minute',
        },
        ...
    }
7 identify the endpoint you want to rate limit.
    class HelloView(APIView):
        permission_classes = (AllowAny,)
        throttle_scope = 'hi' # this is the scope name we defined in settings.py

        def get(self, request):
            content = {"msg": "Hello Hello!"}
            return JsonResponse(content, safe=False)
8 Test Functionality
request_count = 101
url = "https://endpoint:8000/hi/"
headers = {"Content-Type": "application/json"}
for _ in range(request_count):
    response = requests.request("GET", url, headers=headers, data={})
    print(response.text,response.status_code)
In my case, hi endpoint responds with a simple “msg”: “Hello Hello!” message. let’t use this simple for loop to send 101 requests to this endpoint and see when drf will notify us about limit.
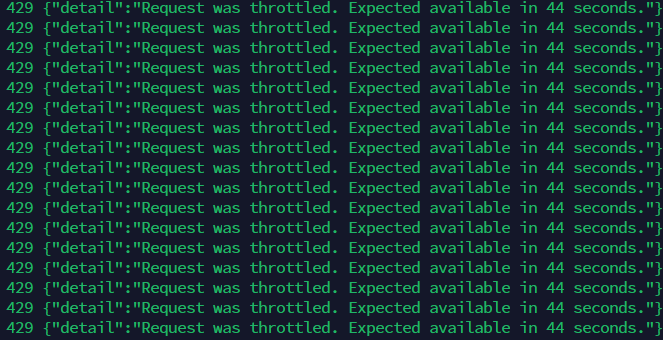
when we reach the limit, drf will respond with a 429 status code and a message like this:

9 Conclusion
this is one of the simplest ways to rate limit an endpoint in DRF. sometimes this is not enough, and you need to have more control over the rate limit.
there is a more advanced way to do this using the Redis and leacky bucket algorithm. I will write about it in the near future.
I hope this article was helpful to you.